Signing Agent
Load balance
TL;DR
- You can run multiple instances of the Signing Agent
- You need to establish a NGINX load balancer to synchronize between them
- Compile your project as a Docker image, start and stop the load balancer
Overview
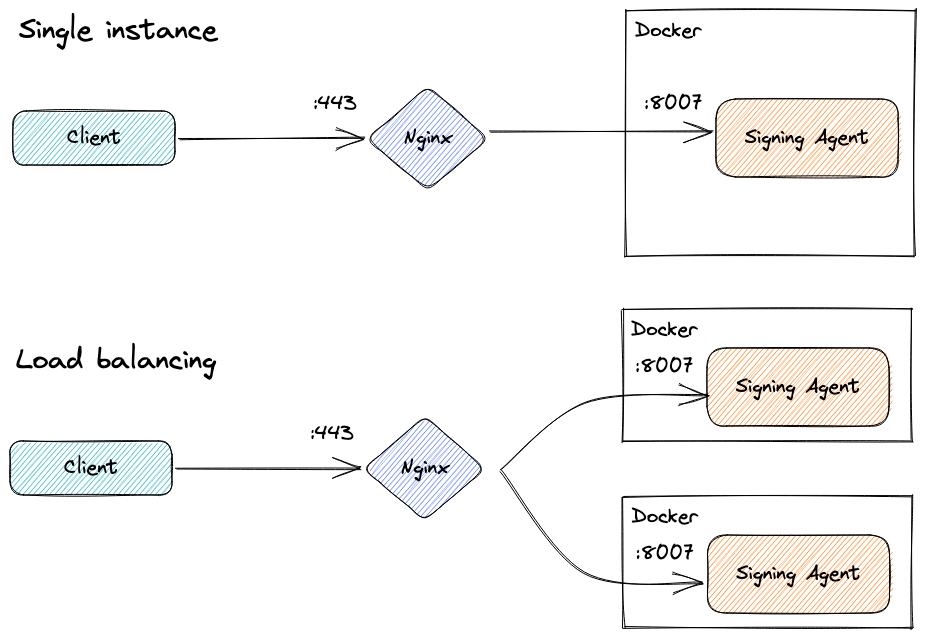
You should be able to run more than one container instance of the Signing Agent, and establish a NGINX load balancer between available instances. A distributed mutex mechanism (based on Redis) is used to ensure synchronization between individual instances.
Compile the project as Docker image
Enter the project directory:
cd {project_dir}Build a Docker image, this can be done with:
./build.sh docker
All necessary files are located in: {project_dir}/dockerfiles/load-balancing
Important variables
The docker-compose.yml presents:
- deploy.replicas: the number of instances we want to run
- ports: the port that accepts the requests
Start the load balancer
Start the service using the command:
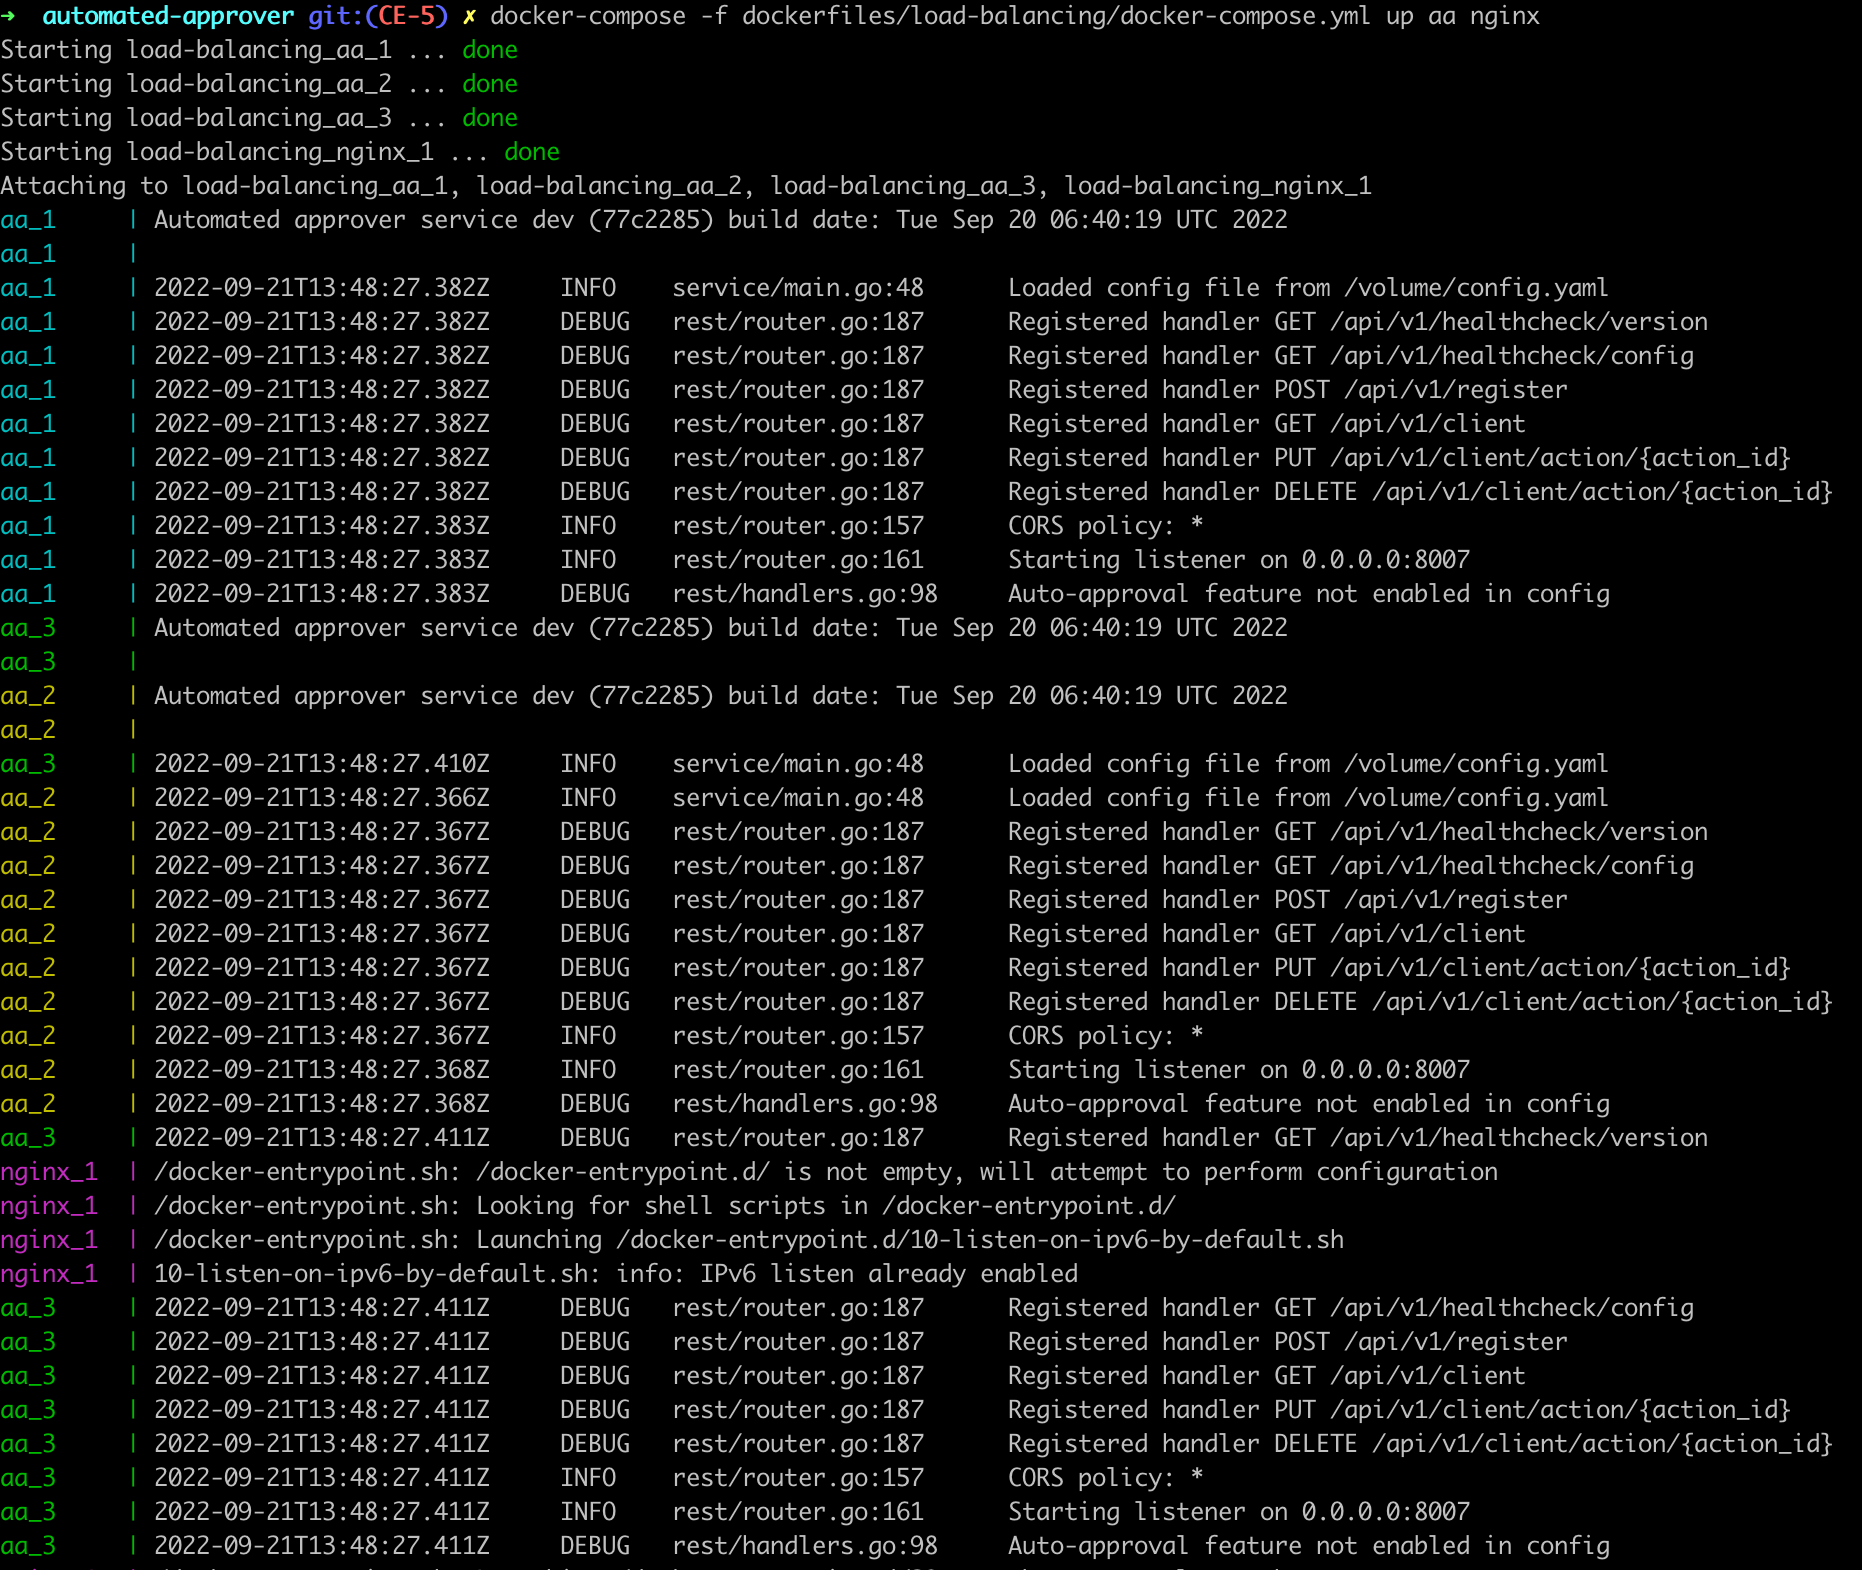
docker-compose -f {project_dir}/dockerfiles/load-balancing/docker-compose.yml up aa nginx
This prepares NGINX and signing-agent images. NGINX uses the nginx.conf file to specify and rotate the requests between Signing Agent running instances, where worker_connections represents the max concurrent connections the load balancer can handle.
Stop the load balancer
Stop the service using the command:
docker-compose -f {project_dir}/dockerfiles/load-balancing/docker-compose.yml down --remove-orphans
Now you can start sending requests to localhost:9090.
Control port
You can change the port by editing docker-compose.yml and nginx.conf.