Partner API
Generate Partner API keys
Prerequisites
To generate keys for the Partner API, you must have the following:
Overview
There are two main steps you need to take:
- Generate a Qredo API key for authentication.
- Generate RSA keys to authorize and sign API requests.
You must never use API keys in the frontend of your application or malicious users could discover them in your source code. You should only use them on your server. You must never embed API keys in your backend code as this increases the risk of discovery.
If an Administrator regenerates an API key, the API key will be updated for all Organizations in which this user has the Administrator role.
Step 1: Generate a Qredo API key
The Qredo API keys are Base64-encoded and are used for API user access. There are two types of Qredo authentication API keys:
- Production keys: use these for live action with the Partner API.
- Sandbox keys: use these to test your integration with the Partner API.
Sandbox vs. Production keys
Sandbox and production keys are used in the same environment. There is no difference regarding their use with the API: the base URL and all endpoints are the same.
To generate a Qredo API key, do the following:
Sign into the Qredo Web App.
In the top right corner, click on your name, select the Account type you need, and click Settings.
From the tabs, select Partner API to display the following screen:
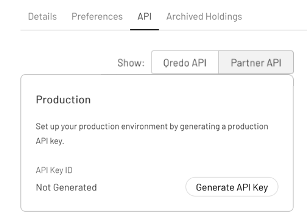
- Click Generate API Key. You will see the following:
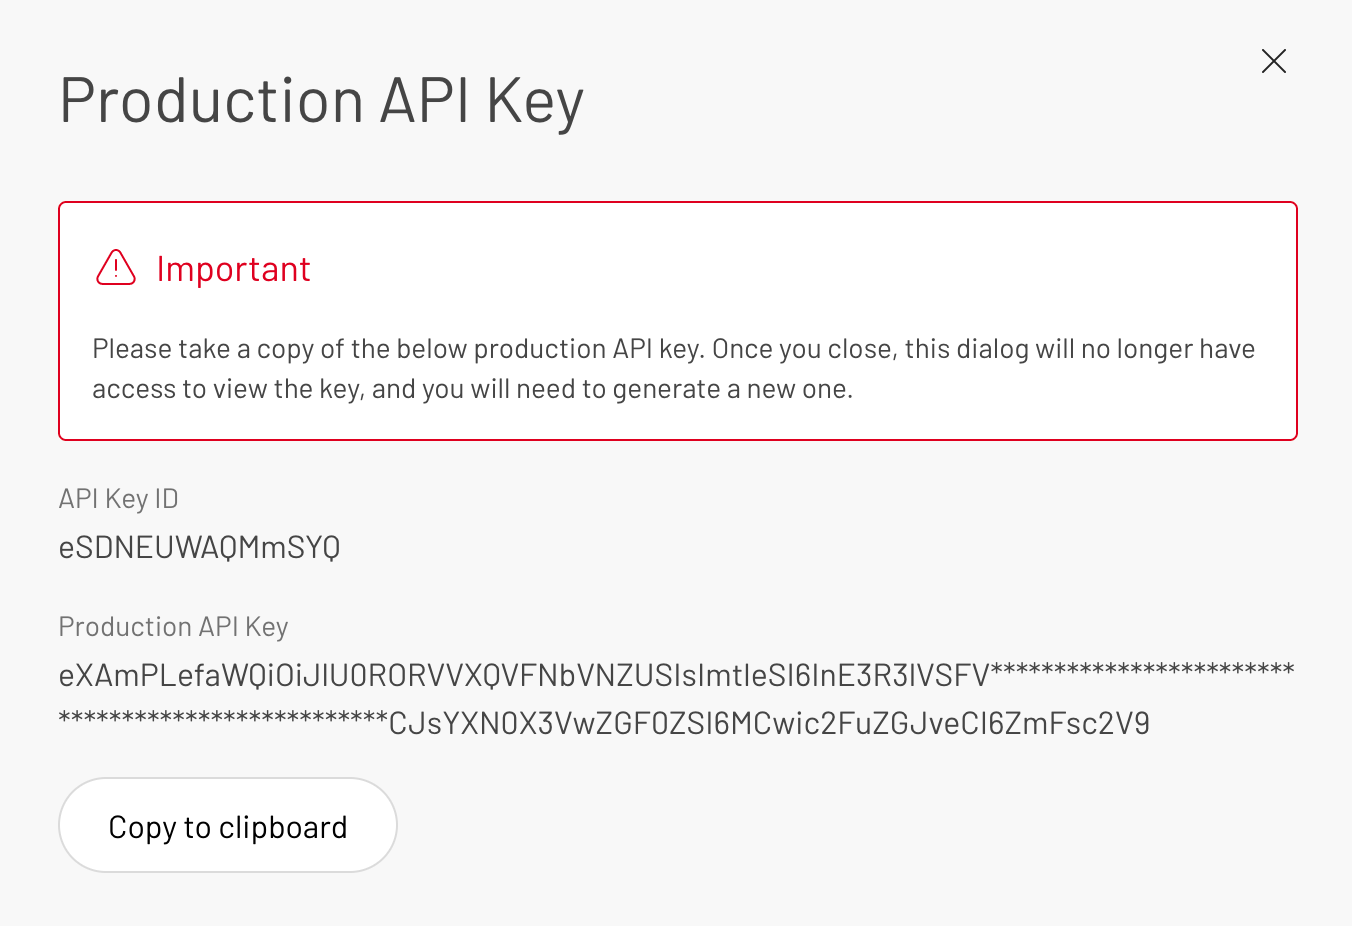
Click Copy to clipboard. This copies the Base64-encoded authentication key for the environment to your clipboard.
Paste the key into a text file and save it as
apikey(no file extension). You will use this file with the Partner API Signing Client.
Regenerate keys if needed
If you lose or forget to copy the API key, complete the procedure again to regenerate the API key.
Keep your keys safe!
- DO NOT share your keys with unauthorized parties.
- DO NOT store your keys in easily accessible or compromizable locations.
Step 2: Generate RSA keys
The API requires an RSA key pair for authorizing and signing requests:
- The private RSA API key signs the requests.
- The Qredo server verifies the signature against the public RSA API key.
The following example uses the terminal CLI (Command Line Interface) for generating the RSA key pair, but you can use any preferred tool to perform this task. The Qredo Partner API works with 2048-bit RSA keys.
2.1. Generate a key pair
Generate a 2048-bit RSA key pair and store the private key in a file named private.pem:
openssl genrsa -out private.pem 2048
You should see the following message:
Generating RSA private key, 2048-bit long modulus...
Some versions of OpenSSL may require an additional argument. For OpenSSL 3.0.7 (20021101), also pass - traditional:
openssl genrsa -traditional -out private.pem 2048
2.2. Extract the public key
Extract the public key from the key pair and store it in a file named public.pem:
openssl rsa -in private.pem -outform PEM -pubout -out public.pem
You should see the following message:
writing RSA key
2.3. Upload the public key
You need to associate the RSA key pair to your Qredo account by adding your public RSA keys using the Qredo Web App.
To complete this procedure, return to the Partner API page in the Web App:
Sign in to the Qredo Web App.
In the top right corner, click on your name and open Settings for the required account.
Select Upload Public Key to open a dialog box.
Locate the
public.pemRSA key file you created earlier and open it using a text editor or list in your terminal.cat public.pemCopy the entire contents and paste into the dialog box.
-----BEGIN PUBLIC KEY----- ExAMplENBgkqhkiG9w0BAQEFAAOCAQ8AMIIBCgKCAQEAyk14HdJt9Tc/Pws3aFLL 9PAt4x+OnuLGmLQHWAM7vucuOR3+rlrpkHPC+9T17sxvVq/BFx2Rkd9pSqD130/W S0MVqCXOwYzB3YdTtiHNNBS4I3fUViYfz7hF3YGUtimMg1RQIerr15bIMUVdAdFY ze7MHYwgYb5YRMUa9d6k4Ehq9lPmwvHwEFVSTCAl9XvGU5+qUK+kLYim2gcdhgXQ Oe8M1bGmWvEOgxg5brUPHzquPMlShiRMO6mibCg6pSb7HsFAucoB8y3soDtHe5Zr qJHgsHTuNhX2PPdOgYVuX8KiTD28zY2VCkDux9DabJ7J5RdxS1nNszea2o9qWhf1 +QIDAQAB -----END PUBLIC KEY-----Click Upload.
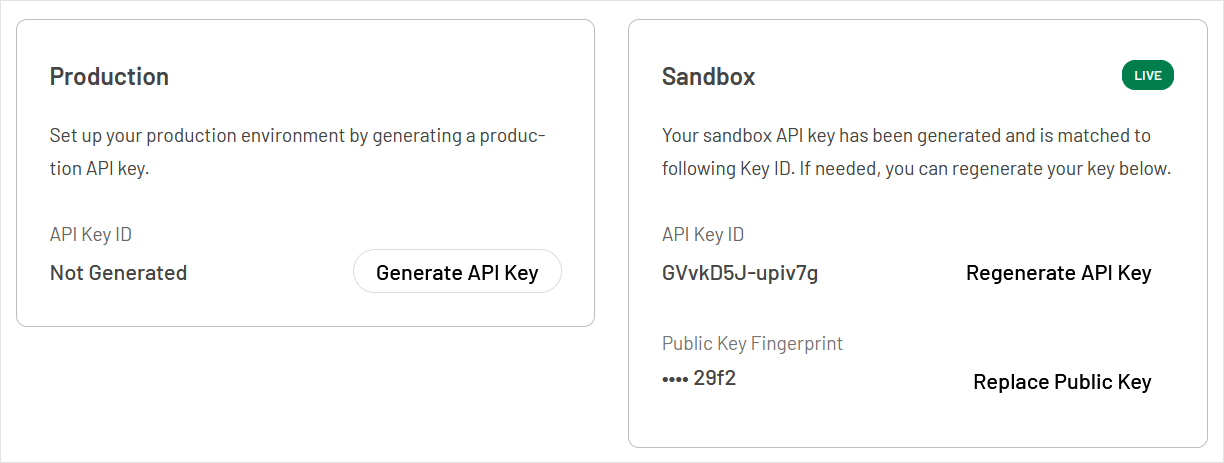
Success: a green
LIVEindicator appears.More recent versions of the Web App support just one key type. Use the key in Production and/or the Sandbox environments according to your need.
Next, understand how to authenticate and authorize API calls.